Showing posts with label computer-maintenance. Show all posts

Saturday 28 September 2013

How-To Run Disk Cleanup in Windows 8

Today’s How-To Guide for the computer beginner is going to over Disk Cleanup in Windows 8.

When you run this option Disk Cleanup you also are given an option to clear the Cache (Temporary internet files).

How-To Clean up with Disk Cleanup is an older article that explains what Disk Clean up is, and explains other details about this application.  The definitions are the same even though it speaks about older operating systems.

First we want to go to the Charms Bar on your start screen, and use the ‘Search’ Charm or option.
Windows have an ‘app’ or program now called, ‘cleanmgr’. 

Type in ‘clearnmgr’ (program name for disk cleanup) on the right side side under the search option pictured below.

On the left hand side of the screen under ‘apps’ you will see the program icon come up.  You click or tap that icon to open up the program ‘disk cleanup’ for Windows 8.
Cleanmgr Disk Cleanup Windows 8

The disk clean up screen for Windows 8 will open up, and you will have a pull down menu to pick the computer drive you want to ‘clean up’.
disk cleanup windows 8
Once you have picked the drive you want to clean up, you click OK.  The familiar options screen pops up to allow you to make choices as we have done in the past with other operating systems (Windows 7, Vista, XP, etc).
Disk-Cleanup Options Windows 8
If you click on the options a description box opens up below, and describes what it will delete or clean up.  In the above picture I have highlighted ‘Downloaded Program Files”.  If you look below that section you will see a description field.

Make sure you click (or tap) which fields you have chosen to clean up, and they will have a check mark in the box.  The ones left with NO check mark it will NOT delete or clean up.

Click or Tap “OK” and allow the computer to run the app or program.

That’s IT!  Your done!

If something is not clear, or you feel something should be added to our lesson? Please feel free to leave your comment or question in section we provided.


Also please subscribe by leaving your email in the box supplied, and you will received future lessons by email as they come out.

Thank you for reading our How-To Guide for the Computer Beginner on Disk Cleanup for Windows 8.

Saturday 11 February 2012

Get In and Get Out of Safe Mode

what-is-safe-modeToday’s How-To Guide for the computer beginner we are going Start Safe mode, and learn how to get OUT of safe mode!

In a past article we spoke about what is safe mode.  Now we will learn how to get to safe mode, and we will then learn about the different safe mode options.

For now… Here are a list of questions we will cover today:
What is Booting to safe mode?
How to start windows in safe mode?
How to get safe mode?
How do i get to safe mode?
How to start in safe mode?
What is Restart in Safe Mode?
How-To get out of safe mode?
We will touch on all of these questions today!

How-To get out of Safe Mode?

I’m going to start backwards today, because its happens to be the easiest answer first! With most Operating Systems you get out of safe mode by restarting your computer.  You don’t need to do anything else. With older operating systems:
  • Restart your computer
  • During start up as soon as you see the Starting Windows logo press the F8 key on your keyboard.
  • Select 'Normal' from the option and press Enter. Your computer should now boot up in the normal mode.

What is Booting to safe mode?

The easiest way I can explain ‘booting’?  It basically turning your computer in safe mode, instead of your normal desktop view.  You want to turn on your computer IN safe mode! They are basically asking you to restart your computer in safe mode.  We cover that below!

How-To Get To Safe Mode?

We will be shutting off your computer briefly.  If you can save your documents, close your programs, etc.  All the things you normally do when shutting down your computer.
Also before you restart your computer in Safe Mode make sure you remove any discs, DVD, or CD Roms from their drive.
Next, If you look at the top of your keyboard you will find buttons that have “F” and a number.  What are all those buttons on my keyboard? seems to be one of the more popular articles on this blog.
F8 button on keyboard
For the safe mode we are going to use our F8 button. 
Make sure you locate that button first before you continue.  Keep in mind all keyboards are a bit different, and your F8 button may look similar to the one pictured.
Now that you know where your F8 button is restart your computer.
Once the computer has turned off completely, and has started up again I immediately hold down the F8 button.  Some people start to tap the F8 button.  Either way the F8 button must be recognized before your normal startup screens or logos are present. If you tapped or pushed the F8 button to late?  No problem restart the computer, and try it again!
The Advanced Boot Options screen will come up next. You will need to use your arrow keys to move up and down the list pictured to select your option.  Arrow_keys
Once you have made your choice use your enter key to select it. The Top option is normally the most popular. 
The Computer will now start or reboot in safe mode. 
Notice compared to our normal desktop with all the colors this menu is pretty plain jane in comparison.  Colors are muted, and ‘safe mode’ is almost watermarked on the screen.  YOU MADE IT! You did the ‘reboot to safe mode’!

Safe Mode By Operating System

I have also made a page on how to start or boot to safe mode by operating systems.  I start with Windows 7 and finish with Windows 95.
If something is not clear, or you feel something should be added to our lesson? Please feel free to leave your comment or question in section we provided.


Also please subscribe by leaving your email in the box supplied, and you will received future lessons by email as they come out.

Thank you for reading our How-To Guide for the Computer Beginner
on how to get get in  and get out of the safe mode!

What Is Safe Mode?

what-is-safe-modeToday’s How-To Guide for the computer beginner we are going to touch on what is Safe Mode?
Our Next Article will cover booting or starting your computer in Safe Mode.
Our First question is:

What is Safe Mode?

Microsoft’s Definition of Safe Mode is:
Safe mode is a troubleshooting option for Windows that starts your computer in a limited state. Only the basic files and drivers necessary to run Windows are started. The words "Safe Mode" appear in the corners of the display to identify which Windows mode you are using. If an existing problem does not reappear when you start in safe mode, you can eliminate the default settings and basic device drivers as possible causes.

To me safe mode is a trouble shooting mode when your computer is having problems. 
Examples of when you may see safe mode is:
  • Virus attack
  • Installed new software, and either computer didn’t install correctly or outright rejects it.
  • Drivers was installed (printer, scanner, etc for example), and again for some reason the computer is rejecting it.
  • Your computer hates the software you just installed.
My list certainly IS NOT complete, but I hope I gave you the idea that Safe Mode is used basically when there is a problem.  You will use safe mode to try to fix the issues that the computer is rejecting.
Most of the time if you install new software or a driver, and you computer rejects it – the computer will crash or locks up.  You restart your computer, and it starts up in safe mode.

What does Safe Mode Look Like?

Your computer desktop will look the same, but the words ‘safe mode’ will almost look watermarked on your screen.  In my experience the desktop icons are normally LARGER than normal as well.  The colors aren’t as pretty, but look washed out.
You may not be able to use your scanner or printer, because only the basic resources are being used. 
As Microsoft advanced their software?  In my opinion safe mode became more easy to use, and to understand.  YEP!  Especially for beginners!

What do I do with Safe Mode?

There will be times in which you can restart your computer once again, and the problem will ‘self correct’ itself.  Other times it may not.  Try restarting it first, because it’s the easiest if it fixes the problem!
So what should you do if your computer boots to Safe Mode again?
First, try to determine what has changed on your system that could have caused Windows to fail to boot properly. If you have added any kind of hardware go to the Control Panel and remove it and uninstall the software driver for that device. Then attempt to reboot your computer.
If Windows boots properly, you can be reasonably certain that there was some type of conflict with the device (or software) and try to resolve it.
Use this same method if you have loaded a new game or application sometime recently. Go to the Control Panel, click on Add/Remove Programs and remove the software. Reboot your computer and hopefully it will start as it should.
The last time I used safe mode was when the children’s computer had an extra nasty virus.  It stopped almost all operation of the computer itself, and I used safe mode to run the anti virus program. 
Our following article is about booting in safe mode, or starting safe mode.  It will also show you how to get OUT of safe mode.
Next we will tackle booting or rebooting in safe mode by operating systems.
Finally, we will cover the different aspects of the safe mode. 
If something is not clear, or you feel something should be added to our lesson? Please feel free to leave your comment or question in section we provided below. 
subscription boxAlso please subscribe by leaving your email in the box supplied, and you will received future lessons by email as they come out.
Thank you for reading our How-To Guide for the Computer Beginner on What is The Safe Mode!!

Thursday 9 February 2012

Safe Mode Windows Vista XP Seven 7

what-is-safe-modeToday’s How-To Guide for the computer beginner we are going to touch on Safe Mode for Windows 7, XP and Vista


This is one in a series of articles on safe mode, and we cover other operating systems as well.

Our first was What is Safe Mode, and then we covered getting in and out of safe mode in a general manner.

How to start a Windows Vista / Windows 7  / Windows XP operating system in safe mode

restart-computer

  • We will be restarting your computer so make sure you prepare your computer for that by removing disks, saving documents, and closing programs.

    Click on Start button and then click the arrow next to the Lock button and then click restart.  Allow the computer to completely shut down first.  Then…
  • Start tapping the F8 key.   The Windows Advanced Options Menu (Pictured above) will then appear. If you begin tapping the F8 key too soon, some computers display a "keyboard error" message. To resolve this, restart the computer and try again. (If you have more than one operating system use the arrow keys to highlight the operating system you would like to boot in safe mode)
  • arrow-keys
  • Ensure that the Safe mode option is selected by using your down arrow key to highlight  the words ‘safe mode’.  If you miss it?  Use your up arrow key to go back.

    Press Enter once you are on the highlighted ‘safe mode’. The computer then begins to start in Safe mode.

arrow-at-safe-mode

If something is not clear, or you feel something should be added to our lesson? Please feel free to leave your comment or question in section we provided below. 

subscription boxAlso please subscribe by leaving your email in the box supplied, and you will received future lessons by email as they come out.

Thank you for reading our How-To Guide for the Computer Beginner on Safe Mode in Windows XP, Vista and Windows 7!

Safe Mode Windows 2000

Safe-Mode-Windows-2000Today’s How-To Guide for the computer beginner we are going to touch on Safe Mode for Windows 2000.


This is one in a series of articles on safe mode, and we cover other operating systems as well.

Our first was What is Safe Mode, and then we covered getting in and out of safe mode in a general manner.

How to start a Windows 2000 operating system in safe mode

Windows 2000 doesn't have the system configuration utility and can only be started in safe mode by using the F8 key during system startup.

  • Restart your computer

  • During start up as soon as you see the Starting Windows logo press the F8 key on your keyboard.

  • From the Windows 2000 Advanced startup menu select safe mode by using the arrow keys and press ENTER when complete.

    arrow-keys
  • I will mention there is an option called, Last Known Good Configuration.  This feature enables a user to load the last working version of Microsoft Windows.  Its something like system restore in more current versions of Windows Operating Systems.
As you can see it looks similar to the menu above, and you will use your arrow keys and enter key in the same way.
    windows-2000-advanced-options-menu

Once you are finished with your fixes you can restart your computer once again to get OUT of safe mode!

Here is a Microsoft Article on safe mode that goes into more detail if you need it.

If something is not clear, or you feel something should be added to our lesson? Please feel free to leave your comment or question in section we provided.


Also please subscribe by leaving your email in the box supplied, and you will received future lessons by email as they come out.

Thank you for reading our How-To Guide for the Computer Beginner

On Safe Mode for Windows 2000.

Safe Mode Windows 98 Windows ME

what-is-safe-modeToday’s How-To Guide for the computer beginner we are going to touch on Safe Mode for Windows 98 or Windows ME.


This is one in a series of articles on safe mode, and we cover other operating systems as well.

Our first was What is Safe Mode, and then we covered getting in and out of safe mode in a general manner.

How to start a windows 98/ME  operating system in safe mode

windows-98-me-safe-mode


Method 1(Most commonly used):

  • Restart your computer

    Control-Key
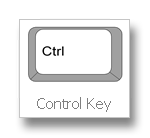
  • During start up press the CTRL key on your keyboard.

  • From the start up menu select safe mode by using your arrow keys and press ENTER when complete.

    Arrow-Keys

Method 2:

  • Click on Start --> Programs --> Accessories --> System Tools --> System Information

    windows-me-system-information
  • From the Tools menu click on System Configuration Utility

  • Click on Advanced and the select the Enable Startup menu checkbox

    system-configuration-windows-me

windows-configuration-advanced-settings

  • Restart the computer and during start up select Safe Mode

Method 3:

  • Restart your computer in MS-DOS mode

  • On the command prompt type "win /d:m" without the quotes

Microsoft Article on Windows 98 Safe Mode

Microsoft Article on Windows ME safe Mode

Problems booting into Safe Mode

If something is not clear, or you feel something should be added to our lesson? Please feel free to leave your comment or question in section we provided.


Also please subscribe by leaving your email in the box supplied, and you will received future lessons by email as they come out.

Thank you for reading our How-To Guide for the Computer Beginner for Safe Mode for Windows 98 and Windows ME.

Safe Mode Windows 95

Safe-Mode-Windows-95Today’s How-To Guide for the computer beginner we are going to touch on Safe Mode for Windows 95.


This is one in a series of articles on safe mode, and we cover other operating systems as well.

Our first was What is Safe Mode, and then we covered getting in and out of safe mode in a general manner.

How to start a Windows 95 operating system in safe mode

Windows 95 AGAIN doesn't have the system configuration utility and can only be started in safe mode by using the F8 key during system startup.

windows-95-startup-menu

  • Restart your computer

  • Start tapping the <F5> key during the Starting Windows 95 message.

  • OR During start up as soon as you see the Starting Windows 95 logo press the F8 key on your keyboard.

  • From the start up menu select safe mode using your arrow keys and press ENTER

    Arrow-Keys

FileMaker Article on Safe Mode Win 95

If something is not clear, or you feel something should be added to our lesson? Please feel free to leave your comment or question in section we provided.


Also please subscribe by leaving your email in the box supplied, and you will received future lessons by email as they come out.

Thank you for reading our How-To Guide for the Computer Beginner on Safe Mode for Windows 95.

Tuesday 16 August 2011

How-to Do a manual Windows Update

We have now answered the questions:

What is windows update?

How do you set automatic windows updates for Vista, Windows 7, or automatic windows updates for XP

If you noticed in our What is Windows update lesson I showed you a pictured of the task bar that at times gives you a notification to check your windows updates.

windows-update-notification
In today’s How-To Guide for the Computer Beginner we will cover

How-to Manually check a windows update

If you have set your computer up for the automatic updates as we did in the past lesson your computer could be:
  1. Telling you that you have some optional updates to look at.

  2. The updates became available recently, and your scheduled update has not occurred since the availably.

I would say those are most common.

We would want to double click on the icon in our task bar that appeared in your notification area – as pictured above.
change-settings-windows-update
In this example, I have both important updates and optional updates.
download-windows-update-message

What Windows Updates to Choose

I have two options here.  I can just go ahead, and install updates by clicking on the button, or I can take a look at the updates themselves to make a decision.

As I mentioned in a prior lesson I tend to install the important or critical updates when prompted to do so.  The optional updates I tend to like to look at before I install them.  Today we will look at both just so you can see them.  Click on the blue words, ‘2 important updates are available’.  You will come to the screen below
select-all-windows-updates
You can read the description of each update by clicking the box next to the name one at a time, and in the blue section it will give a description.  Microsoft also supplies you hotlinks to articles for more information.

select-the-updates-you-want-to-install
You don’t have to click all the updates individually, but of course can if you want to.  If you notice in the picture above we can click on the top box, and that will select ALL the important updates listed.
You would click OK at the bottom of the screen when you are done selecting your windows updates in this section.  This will bring you back to the original

select-optional-windows-updates screen, and you can do the same clicking on the blue words  1 optional update is available

In my picture above they are telling me that I have an optional update for my Kodak printer.  I can either make the decision to select the update for my printer, or I can make the decision NOT TO.  Again I can click OK, and I’m brought back to the original screen once again – seen below.

Install Windows Updates

download-windows-update-message
Since I know what updates the computer asking me permission to update?  I can click INSTALL UPDATES at this point.
progress-windows-update
You will at this point get a progress screen as the program progresses. Depending on the size or number of updates you chose to do?  It could take some time.

I have found if your computer internet speed is slower?  If you do smaller numbers of windows updates at times – starting with older ones moving to newer ones?  It will go faster, or if your computer struggles with these updates?  It doesn’t seem to hang up or freeze up as much when you do them in smaller parts.
At times you are prompted to reboot your computer, and that will finish installing the updates.

If something is not clear, or you feel something should be added to our lesson? Please feel free to leave your comment or question in section we provided.


Also please subscribe by leaving your email in the box supplied, and you will received future lessons by email as they come out.

Thank you for reading our How-To Guide for the Computer Beginner on doing a manual windows update!!

How-To allow Windows Updates to run automatically in Windows XP

In Windows XP you can configure your windows update to be done automatically.  In a past lesson we explained What is a Windows Update?

Today’s How-To Guide For the Computer Beginner we will learn:
How-To allow Windows XP Updates to run automatically.

Windows Updates For Windows XP

In Windows XP we want to click on our start button, and in the search box type in ‘windows update’. 
XP-Windows-start-windows-update
XP-Windows-Update-Selection
We are going to make sure your computer settings are set to do the windows updates automatically.
xp-windows-update-settings
Look to the left hand side of this new window, and we want to click on ‘settings’.
Once you open t
his section it will give a number of different options for you to choose from.
xp-windows-automatic-update
As you can see on top you have a pull down box, and it will give you different option of WHEN to do the updates.  To make sure you get all the available service packs for windows XP?  They state the easier way is by the automatic update option.

If this does not work?  How to install Windows XP Service Pack 3
or How to Obtain the Latest Windows XP service Pack.

I have my computer on all the time, and I choose the option of allowing the computer to do my windows updates at 3:00 am each day.  I know I will be sleeping, and it won’t interrupt things during the day when the computer is in use.

You can change these times and dates to what you best for your circumstance.
xp-click-apply-ok
You can click APPLY and then OKAY at the bottom to save your changes.

You have now changed your computer to do your windows updates automatically.

Don’t forget to read the article on manually doing windows updates!

If something is not clear, or you feel something should be added to our lesson? Please feel free to leave your comment or question in section we provided.

subscription box
Also please subscribe by leaving your email in the box supplied, and you will received future lessons by email as they come out.


Thank you for reading our How-To Guide for the Computer Beginner, and today’s lesson on turning on automatic windows updates on Windows XP!!


How-To allow Windows Updates to run automatically in Vista or Windows 7

In Windows Vista or Windows Seven (7) you can configure your windows update to be done automatically.  In a past lesson we explained What is a Windows Update?

Today’s How-To Guide For the Computer Beginner we will learn:
How-To allow Windows Updates to run automatically.

Updates For Windows

In Windows Vista or Windows 7 we want to click on our start button, and in the search box type in ‘windows update’.  You will see at the top of the start menu the option for Windows update as seen below, and we want to click on windows update to open a new screen
find-windows-update
Once the new window appears it will note the windows updates that are available for your computer.  We are going to make sure your computer settings are set to do the windows updates automatically.
change-settings-windows-update
Look to the left hand side of this new window, and we want to click on ‘change settings’.
change-settings
Once you open this section it will give a number of different options for you to choose from.
change-settings-windows-update-screen
As you can see on top you have a pull down box, and it will give you different options to choose from.
  1. Install updates automatically (recommended) - If you select this option then all critical updates will be downloaded automatically and installed on your computer. These updates will be installed at the time you specify in the fields labeled Install new updates. This is the recommended option for the majority of people as it guarantees that you have all the critical updates automatically installed on your computer.

  2. Download updates but let me choose whether to install them - If you select this option, Windows will download updates to your computer, but not install them automatically. If you want to install the updates then you must install them manually. You should only select this option if you have a reason for not installing updates automatically. Only advanced users should use this option.

  3. Check for updates but let me choose whether to download and install them - If you select this option, you will be alerted when there are new updates available to download and install. You can then choose to download and install the updates that you wish. This option should really only be used by people who know exactly what updates they need or those who have limited access to the Internet.

  4. Never check for updates (not recommended) - If you select this option, Windows will never automatically check for updates. This option should never be selected as it puts your computer at great risk to being compromised, infected, or hacked.

I have my computer on all the time, and I choose the option of allowing the computer to do my windows updates at 3:00 am each day.  I know I will be sleeping, and it won’t interrupt things during the day when the computer is in use.
important-updates-option
You can change these times and dates to what you best for your circumstance.
recommendated-updates
I have opted to have my recommended updates done at the same time as my important or critical updates.
You may also have the second option of asking WHO may do the windows updates for the computer.  If you leave this unchecked it would only the administrators on the computer. 
optional-updates
These messages deal with the optional updates.  These are the ones that you can choose to see if they are important for you computer or NOT important.

You can click OKAY at the bottom to save your changes.

You have now changed your computer to do your windows updates automatically.

Make sure you also read How-To do a manual windows update!

If something is not clear, or you feel something should be added to our lesson? Please feel free to leave your comment or question in section we provided.


Also please subscribe by leaving your email in the box supplied, and you will received future lessons by email as they come out.
Thank you for reading our How-To Guide for the Computer Beginner, and today’s lesson on turning on automatic windows updates on Vista and Windows 7!!