Monday 26 May 2008

What do they mean by 'desktop'?

There are two terms that I can see people getting confused about when someone mentions 'desktop'! It’s easy to figure out the two when someone explains it to you!

Once you grasp this it will be pretty plain which they are referring to! They are completely different! When people talk about 'desktop' they could be referring to either 'desktop computer' or 'computer desktop'.

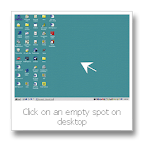
When you turn on your computer, and you look at the monitor you will see an image. My children used to call the monitor the computer's TV screen! The image inside that TV Screen is the 'computer desktop'.


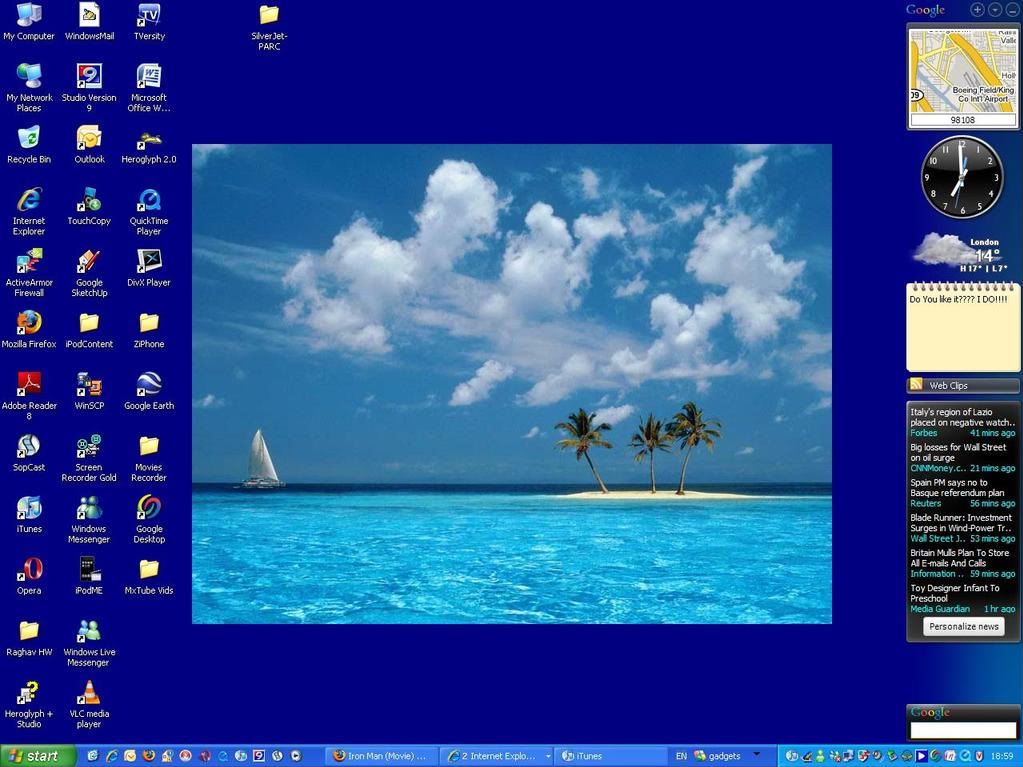
These are examples of computer desktops. Your computer desktop may not look the same, because there are to many themes to mention! You could be using one that came with the computer, or something placed on there for you! 'Desktop Theme' if you haven't guessed is the look of your desktop! A times you can get themes with custom icons, background pictures, and even customize your cursor!


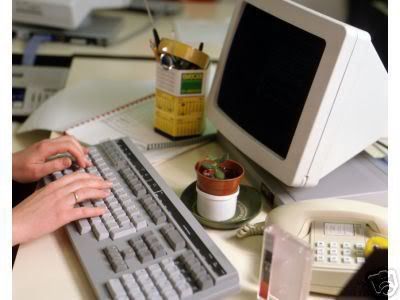
The other term is called 'desktop computer'. It’s literally a computer that you can place on your DESK! I believe they call it desktop computer because of they different types of computers. Laptop computer will be another type that you may have heard of!

Below is a ‘desktop computer’

Computer

Just for the sake of visuals laptops are all in one, and as you can see from the picture everything is contained within one unit. It’s compact and folds up, and could fit on your LAP! Notice the keyboard, monitor and everything else that is needed is ONE unit, and not different ones like the desktop!

laptop

As you can see now you have a 'computer desktop', and a 'desktop computer'.

ComputerThe easiest way you can remember the difference is the desktop computer SITS on your desk (laptop computer can sit on your lap)!

The ‘computer desktop’ is the image ON your computer monitor!

Computer desktop


See the difference? That wasn't so hard was it? NOW you are a pro!

The next lesson will try to break down into sections. We will show you the different parts of the computer desktop, so you will know what they are and how you can use them!

Wednesday 21 May 2008

How to clean up with DISK CLEANUP!

Disk CleanupOne of the basic computer operations is called Disk Cleanup.  Disk Cleanup is one of the computer maintenance options that is needed to keep you computer running smoothly.  One way of looking at Disk Cleanup is taking out the trash!

How-To Guide for the Computer Beginning will be on clean up with DISK cleanup!

(How-To run Disk Cleanup on Windows 8)

What are we cleaning up?

'Disk Cleanup' helps you cut the clutter on your Windows 95/98/Me/XP/Vista/Seven computer’s hard drive. The utility, which is built into Windows, finds unnecessary files in various categories such as Temporary Internet Files and Offline Files. You can then choose which categories to delete, often freeing up many megabytes or even gigabytes at one stroke.

You basically are taking out the trash, so you have more room for other things!

When you are asking for troubleshooting advice on your PC one of the first things you will hear them ask you to do is run Disk Clean up. They don't ask this because of its awesome qualities of fixing issues, but it does eliminate some variables in the troubleshooting process! It could be a corrupt file that is causing you issues for example, or just lack of disk space that you can free up using this process!

Disk Cleanup also doesn't detect duplicate files, such as multiple copies of space-eating songs and photos. Still, it's a useful tool with which every Windows users should be familiar.

The important issue here is Disk Cleanup frees disk space by cleaning up areas that gather unneeded files. Using Disk Cleanup regularly, along with using ScanDisk and DEFRAG and keeping your virus patterns up to date, will help keep your computer running smoothly.

For the older operating systems:

start programs accessories system tools disk cleanupClick the Start button, and select Programs, then Accessories, then System Tools, and then Disk Cleanup


Select-DriveSelect the drive on which you would like to free up disk space (usually your C: drive).  As you see from the picture you have a pull down menu you click to show you the options.  A Drive in older operating systems are normally your floppy drive.  We are looking for our Hard Drive.

For new operating systems the process is similar

start-button-computerStart Button
To Computer


right-click-to-properties
Generally, your C drive is your drive that you want to clean.

Right click on your C drive, and go to properties.


general-tab-disk-cleanup

We are looking for your General Tab that you see on the top, and then we will be clicking on ‘disk cleanup’.


Generally, in older operating systems you have less options than with newer operating systems as to what you wish your disk cleanup to WELL – CLEANUP!

As you can see from our picture clicking on the box next to the titles is part of the selection process.  For example, if you wish your recycle bin to be cleaned up?  You would make sure you have selected it, by making sure the X is in the box.  If you want to leave it alone? Disk-Cleanup-For Keep it empty.

As you may have already noticed when you click on each section a description box will pop up, and give you a description of each area of the disk cleanup.  If wish to double check something? 

Notice you have a ‘view files’ options as well.  Since the recycle bin is empty (0 kb) in this screen shot we can’t use the ‘view files’ option, because there is NOTHING to view!  You can if you wish view other options to see what you are going to be cleaning up.

Select from the four areas that Disk Cleanup will check and clean up:


Temporary Internet Files: These are files stored on your local drive to allow web pages to load more quickly.

Downloaded Program Files: This is a storage location for programs downloaded when you visit specific web sites that use ActiveX and Java applets.

Recycle Bin: These are files marked as deleted.

Temporary Files: These are items in the TEMP folder.

For more information on what is cleaned up when you select one of these options, highlight any of the options and read the expanded information in the "Description" text box. If you are not sure what the explanation means - google it for quick reference!

Unless you may have personal reason for wanting to leave stuff alone?  Most people select all of the above, and then hit OK to start the cleanup disk process.

disk-cleanup-files-to-delete
With Newer operating systems as you can see the screen is pretty similar. 

Again you can go down disk cleanup list to highlight each section, so you can read the description of what you are cleaning up.

As you place checks in the boxes for selection for the disk cleanup?  You will notice the computer will tell you how much space you are freeing up.  In the case of the screen shot I have is 611 kb.


disk-cleanup-more-options-to-deleteThere is a section tab called ‘more options’ for your disk cleanup.

The top part called, ‘programs and features’ brings you to a section on your control panel, so you can uninstall programs if you wish to free up even MORE space.

Unlike older operating systems you also have system restore copies.  You have the option of deleting those as well, and just leaving the last one available on the computer for emergencies.

Again once you are done selecting all you wish to clean up you will click the ok button.

disk-cleanup-options
At times you do get an additional option screen at this point with newer operating systems.

Hopefully, the message on the screen is self explanatory.  Some computers are setup to have more than one user.  The screen is asking you if you wish it to do disk cleanup on the entire computer (all users), or just do a disk cleanup on your files only.

For myself?  I always select, ‘files from all users on this computer’


are-you-sure-you-want-to-delete
As with most screens with new operating systems you always get the ‘are you sure’ screen!  Click Delete Files.


The next thing you know you are getting a little graphic of some sort telling you that the computer is doing your disk cleanup.
Disk-Cleanup-Progress
disk-cleanup-working
Keep in mind if it as been a while since you did a disk cleanup?  Be patient.  I have noticed at times even the screen flickering as it does it job.

What is nice about the newer operating systems is you can schedule this task automatically.  How-To Geeks have a good article on how you can accomplish scheduling your disk cleanup.

If you have any question please feel free to ask them in our comment section.

Remember to place your email in our subscribe box you can get future lessons sent directly to you.

I hope I helped you understand our ‘How-to Guide for Computer Beginners’ lesson on Disk Cleanup! 

Look for our future article on CCLeaner a free program that helps in the disk cleanup task as well.

Run Scan Disk to keep your computer running well!

So why should you run Scandisk and what is Scandisk anyway?

Scandisk does just what it sounds like, it scans your hard drive looking for errors and correcting them.

The hard drive is where Windows (or what they call your Operating System) is installed, and all of your programs and any files you may have created.

If you ever turned off your computer by just turning off the power (You should try NOT to do this!See the article on Down shut off the power! ) then errors can occur on your hard drive. If you get errors in the wrong place, then some programs won't work right, maybe they won't even open or even files seem to be gone!


So after awhile you need to run Scandisk. Before you open Scandisk, make sure you don't have any programs open. If you have a Screensaver, make sure it is turned off.  Turning off Screensaver applies to older Operating Systems.


Now click on your Start button and select Programs. In the Programs menu select 'Accessories', then select System Tools.


Now click on Scandisk. When the Scandisk Program opens, put a check mark in the little square at the bottom to automatically fix errors.


Then start the program & go find something else to do for a while. Scandisk can take a long time to run, so don't do this if you have something else you want to do on your computer right away. If you are using Windows 95, Windows 98, Windows 98SE or Windows ME, you need to run Scandisk once a month.

Once completed, you can go back and put your screen saver and background back to where you had it. You should perform a disk defragment after performing a ScanDisk.


Here is a video on how to Scan Disk on Windows XP


Scan Disk on Vista


Thursday 15 May 2008

How do I turn on or off the screensaver?

Cat-likes-screensaver
Welcome!

Today on How-To Guide for the Computer Beginner we will be learning about computer screensavers.  In today’s lesson we will show you how to turn on your screen saver, or turn off your screensaver.


See the cat ready to attack those fish in that screensaver on the computer? (giggles) I love it!

The Start of the Computer Screen Saver

Burnt-Image-on-CRTScreensavers were originally designed to protect computer monitors from phosphor burn-in.

Early CRT monitors, particularly monochrome ones, had problems with the same image being displayed for a long time on your monitor.

The phosphors, used to make the pixels in the display, would glow at a constant rate for such a long period of time that they would actually discolor the glass surface of the CRT.

This discoloration would then be visible as a faint image overlaying whatever else was displayed on the monitor.  I tried to find a clear picture of what is meant by screen burn in, but as you can imagine its hard to take a picture of it.  This orange screen above you can see segments of the letters, and rows.  Those images were burnt permanently on your screen.

Luckily, with advances in display technology and the advent of energy-saver monitors have virtually eliminated the need for screensavers. But we still use them, because they are FUN!

I remember using a black screen with bright green letters when I worked for a company years ago, and the screen I used most often was pretty much BURNT into the screen forever! I have to say monitors have come a long way baby! The old ones I think are responsible for the glasses I have to wear now. 


It dawned on me that maybe people don't know how to turn them OFF or even turn them ON for their computer! THIS part will be easy! I promise!

We will start with the most recent operating systems, and then show you how to turn on the screen saver, or turn off the screen saver with older operating systems.

How-To turn on your Screen Saver


I think the most common way of doing this is click on empty section of your desktop!

Then right click on the desktop, and you should see a 'personalize' section!personalize


Click Personalize.  A personalization section will open up with the newer operating systems.

personalize-settings

This personalization screen will give you a couple of options, but we are looking for ‘screensaver’ today.


The screen saver option should look similar to this screen shot below
screen-saver-option

At this point you will click on the blue letters that say, ‘Screen Saver’ at the top.

You will then be presented with a new screen.screen-saver-settings

If you look towards the middle you will have a pull down menu that gives you choices that you have available on your computer.

The list in the screen shot here starts with 3D test, Acer, etc.  Yes, they are all assigned a name.

You also have two different ways of previewing the screen saver before you make your decision on which one you want to use.

I will select ‘bubbles’ for today.  When I click on the ‘bubbles’ screensaver from the drop down list I will be able to get a small preview within the picture on the top.

select-screen-saver
Now if you are ANYTHING like me?  This section is way to small for me to get an idea of what the bubbles truly look like.


I want to be able to see it full screen, so I truly understand what the screen saver looks like.  People with better eyes than me may not have that issue.

If you look at the screen shot above you have a ‘preview’ button.  This will allow the screen saver to give a true idea as to what it will look like on your computer monitor.  To stop the preview?  Just move your mouse, click your mouse, or hit a key on your keyboard.  It will bring back your option screen without all the graphics.   TRY in now!

screen-saver-settingsNot all your options for screensavers will give you information on the ‘settings’ button.  Some screen savers offer you settings, and some do not.  Bubbles in my case did not, and gave me a message telling me that. 

I wanted to be sure you knew what the settings button would look like IF you screen saver offers one.  What is neat is you can play with how you want your screen saver to display.  Some have sounds, dome to do.  Select your option in the drop down menus that they offer you, and click on ‘okay’ to see the differences.  Remember your ‘preview’ options we already spoke about.

screen-saver-settings-screen
Lets go back to the original settings screen so I can point out additional options to you.  We will be moving right below your screen saver choices.


timer-for-screen-saver


The ‘wait’ section asks you how many minutes do you want your screen to stay ‘idle’ before the screen saver starts up.  I would call this a timer.

For example, lets say you were working on your computer and you hear the doorbell ring.  You leave your computer on, and go to answer the door.  Your computer would be ‘idle’ at that point.  Pick how many minutes you would wish the computer to stay idle before the screen saver starts.  Click the up or down arrows next to the number to make your selection.

‘On resume, display logon screen’ box. 

I personally don’t use this option.  If you click to leave an check in that box you will have to sign on to your computer once you come back.  It would be the same sign on your use (if you use one) once you turn on the computer for your screen name.

I also don’t fool with the power settings. 

Lastly, when you are done making your decisions?  You would click ‘apply’, and at times you also need to click ‘okay’. 

How-to Turn off Your Screen Saver

If you didn’t notice in the drop down options for which screen saver to use?  Lets look at that portion again!

turn-off-screen-saver
The first choice you have on your list is called, ‘NONE’.

So if I wanted to shut off my bubbles screen saver, and not have one at all?  I would use that same screen list.  I would select – NONE!

Again then hit ‘apply’ and possibly ‘okay’ as well.  You have NOW turned off your screen saver!


For Older Operating Systems the process is similar.  Instead of selecting ‘personalize’ from your desktop options you will be looking for ‘properties’.


See the below video for a visual!


Below is a Windows 95 properties screen!

Green finger shows the 'screensaver' tab!
Red Finger shows you the pull down menu!
Blue shows you the apply and OK buttons to push when you are done with your selection!
win-95-screen-saver-options
Keep in mind most of the older systems will have similar looks, and the directions are the same!

They might have made the screen saver options look a bit more fancy, but the principal is the same!

If you look next to that 1/2 globe you will see an option there so you can tell the computer how many minutes you wish it to wait to turn on your screensaver!

How-To Turn on or Turn Off Screen Saver in Windows XP

The image right below that one is of Windows XP, and you can see the screensaver principals are the same! THEY just made it prettier! 


windows-xp-screen-saver-options 


Lastly, its kind of fun to make you own screen saver.  The link below is a video to show you how to make your own screen saver using photos you have on your computer now.  NEAT!

Create A Screen Saver Using Windows XP/Vista

I hope this How-To Guide for Computer Beginners lesson on turning off the screen saver, and turn on the screen saver was helpful to you.

If you have any questions or comments please leave a comment in the section provided below.

You can also leave your email address in our subscribe box, and get all future lessons sent to you directly to your email!


Wednesday 14 May 2008

How-To Change The Font Size On Your Computer Monitor


Ever wanted to change the font size so it was bigger (or smaller) than what is being displayed on your monitor? NO PROBLEM!

Click here if you looking for the article to change your font size in your web browser!

Learning How-To Change your font size on your computer will be a pretty easy thing to do for even a computer beginner. 

Its nice to know you can make the fonts bigger or even make the fonts smaller  We basically will change the DPI or Dots per inch!


We will start with some older operating systems, and then move on to the newer ones.

Changing your desktop font size in Windows 98


Find an empty place on your desktop, and click on it.
Right click in an empty place and select Properties

1)  Select the Appearance tab.
Under Appearance you have a Scheme selection and an Item selection.

2) You can change your icons under Item Select Icon if you wish by using the drop down box. 

3)  As you can see for number 3 in the picture the font name is Tahoma, and the Font size is 10.  This is basically the font property section.
Windows 98 Display Properties Box
   
To increase your font size you would pick a number GREATER than 10, or in your case GREATER than the number that your Display properties is showing. 

If you wish to decrease the font size or make the font smaller you would use a number LOWER than 10.


If you find that you prefer a different font you can change that at this time as well.  If you are looking for readability you may wish to play with the font sizes and types to choose one that works best for you.


Changing Your Desktop Font Size in Windows XP

Right-click an open area of the Windows Desktop and then click "Properties" to open the "Display Properties" window.

Click the "Appearance" tab.

In the drop down list labeled "Font Size", select the desired size.

Click "OK" to save the change and exit the "Display Properties" window.


There are three font sizes to choose from, these being, "Normal", "Large Fonts" and "Extra Large Fonts". As the name implies, "Normal" is the Windows XP default size. To return to the default font size, follow the procedure outlined above and choose "Normal" in the "Font Size" list.

The change will alter the font display in Windows title bars, dialogs and menus. It will not normally alter the font in documents such as word processor files or web pages.

To increase font size on Vista computer:

Unless you are signed in as the administrator on the computer Vista may not allow you to do this. You will need to disable the UAC or User Access Control First.

First we go the the Vista Control Panel.


Start Button to Control Panel brings you to the above screen


Click: Appearance and Personalization
Then Click: Personalization


LOOK to the left and you should see a section called 'adjust font size'.  It is circled in red for you.


You can click the larger DPI option at this point! Then look to the bottom, and click apply!

Most of the time you must click OKAY as well .

You will have to restart your machine to make sure it takes!

Notice at bottom there is a grey button for ‘CUSTOM DPI’ that you can use for other choices.


Custom DPI Setting for changing FONT size on your computer


Keep in mind that 100% is your normal screen size, and you go up from there!

ALSO you will need to click that yellow highlighted area to avoid the screen being blurry due larger screen size. The text and other items on the screen might appear blurry in some programs that are not designed for high–DPI display in Windows Vista. That section will help you in that!

The change can be applied only after a system restart. Close all the running applications, save your open documents and then press on Restart Now. After a reboot, the font size will be changed.

Learning How-To Change the Font Size on Your Computer Monitor does for the eyes! (giggles)  I hope My How-To lesson was easy to understand.  If something is not clear?  Feel free to leave a comment!

Want to Increase Font Size in your browser now?


How to find the control panel in Vista!

Today’s How-To Guide for the Computer Beginner is how to find your control panel in Vista.  Vista is your operating system.   The control panel in your Vista Operating System is something you will use quite a bit at times.

If you look on your desktop towards the left hand side you will see your start button.

Windows-Vista-start-button This image is your start button, and you would need to click that once.  You will notice that a new screen appears, and will be similar to the one I have pictured below. 

start-button-to-control-panel-vista


The red Finger in the picture is pointing to the start button we mentioned already.  You will need to look over towards your right, and you should see the words ‘control panel’.  I have a yellow finger pointing at the one supplied in the picture.


Vista Control Panel can be viewed once you click on the words ‘control panel’ which I pointed to with the yellow finger!

Below is an up close screen shot for you.


Vista has two views of your control panel.

Vista-Control-Panel-Screenshot

This screenshot of the control panel tends to be the default view of the control panel in Vista.

If you look at the green section towards the top you see will the option ‘Classic View’ on your control panel.


Vista-Classic-view-control-panelIf you click on the ‘classic view’ of the control panel you will notice you have a list of all your control panel options. 
You also have a scroll bar to your right that allows you to move up and down the list.

You can click ‘control panel home’ in the green section once again if you prefer to use the first view of the control panel.


I have noticed that some people have been searching for answers, because icons are missing from the control panel, or they can’t open the control panel.

Microsoft Vista came out with a ‘service pack’ that should resolve your issues.  Service packs are basically updates to operating systems to resolve problems with the operating system, or what they call ‘bugs’ in the system. 

I will be writing a update windows lesson soon, but I did wish to point out that Microsoft has addressed the problem of the missing icons, or the control panel not opening in Vista.

They are basically asking you to download a service pack that should resolve the issue.

The symptoms they listed were:

On a computer that is running Windows Vista, you experience one or more of the following problems:
  • Icons are missing from Control Panel.
  • You cannot start Control Panel. When you try to start Control Panel, the screen may flash briefly, but Control Panel does not start.
  •  
  • You cannot start the Welcome Center. For example, when you type welcome center in the Start Search box, and then you click Welcome Center in the Programs list, nothing happens.
  • You cannot start Windows Vista games such as Chess or Minesweeper. When you try to start the games, nothing happens.
These problems may occur intermittently.

I hope our How-To Guide of the computer beginner lesson on Vista Control Panel was helpful.  As always if you have any questions of comments please see the option that allows you to do this.

Also make sure you look for our subscribe section to enter your email address, so you can get future lessons sent directly to your mailbox.