Thursday 12 June 2008

What is Spyware? What do you because it can't be GOOD?!


PC Vs Mac Spyware Commercial -


That commercial just tickles me! PC gave you an idea of what spyware is!

From From Wikipedia, the free encyclopedia the definition is:

Spyware is computer software that is installed surreptitiously on a personal computer to intercept or take partial control over the user's interaction with the computer, without the user's informed consent.

While the term spyware suggests software that secretly monitors the user's behavior, the functions of spyware extend well beyond simple monitoring. Spyware programs can collect various types of personal information, such as Internet surfing habit, sites that have been visited, but can also interfere with user control of the computer in other ways, such as installing additional software, redirecting Web browser activity, accessing websites blindly that will cause more harmful viruses, or diverting advertising revenue to a third party. Spyware can even change computer settings, resulting in slow connection speeds, different home pages, and loss of Internet or other programs. In an attempt to increase the understanding of spyware, a more formal classification of its included software types is captured under the term privacy-invasive software.

In response to the emergence of spyware, a small industry has sprung up dealing in anti-spyware software. Running anti-spyware software has become a widely recognized element of computer security best practices for Microsoft Windows desktop computers. A number of jurisdictions have passed anti-spyware laws, which usually target any software that is surreptitiously installed to control a user's computer.


Major YUCK right???

Along with Spyware you have other types of infections!


Adware, Malware, Spyware all very hard on computers, and can cause all kinds of issues!

One thing I get asked alot is, "WHAT did we do to get it there in the first place?" The simplest answer is pretty much nothing! Its pretty much IS part of the Internet community, and for PC users (remember the commercial) its part of our reality online!

Another thing you need to remember is these infections are like an onion! You peel off the first layer, and you still have that next layer of skin!

We are going to use what I call the ONION peel method of taking care of these infections! KEY - remember ONION!

red onion Pictures, Images and Photos
When you run your programs to get rid of these infections you may have another layer of spyware ready to crop up! RUN the program until you get NOTHING left! Remove all the layers!

Another part of this is you need to layer your programs! There are alot of really NICE programs out there for these infections, and alot of them are free of charge! Even if you purchased one program, or may even HAVE a program on your computer ready to combat these little buggers you need layered protection! There isn't anything WRONG with these programs. I think its just the nature of the beast!


I realize there are alot of people that have older software systems, and some of these up to date programs will NOT work for you! In my blog roll I have two links for websites that have downloads for some nice programs for older systems.

The first program I use is Ad-Aware. I found a video that will give you good visual! The program has been updated since this video, but when you use it you will see most of the aspects are the same! The only thing he didn't mention was to RE RUN that program until its ALL gone!


The second program I like to use is Ewido. Ewido has an online scan, and it will ask you if you can download an application. I have also been using this for while, and I will tell you it takes a while to run. The older operating systems may not be able to use this program.

I'm sure your friends and family have other programs they like to use. Those are two I like to use. So GO and get that SPYWARE, ADWARE, MALWARE.........and DELETE DELETE DELETE!!

What programs do you use already?

Wednesday 11 June 2008

What are all those buttons on my keyboard?

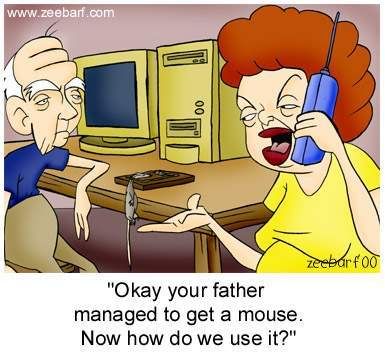
I saw this message, and I had to share it with you today! Somehow I can picture a computer giving this keyboard error, and you left scratching your head wondering....and HOW are you to PUSH any key to continue???


Indiana University had this diagram of a typical keyboard.

As always keep in mind there are different looking ones, but most of them all have the buttons we are going to talk about today!


Keyboards are similiar to the typewriters of the past! You had the letters, numbers, shift, backspace, spacebar on them, and they are still present on your keyboard. Your carriage return is now called "ENTER"! What is nice is you don't have to use the carriage return like you had in the past, because the computer will do that for you! IF you want to make a new paragraph of course you would use that enter key as you carriage return!

Lets start on the first row of keys!

ESC

You can use the ESC (or escape key) in most programs to back out or quit whatever you happen to be doing at the time.

Most of the time I see people use this with video's for example! They want to see videos in FULL screen mode, and when they are done viewing they will hit the ESC key to bring the screen back to normal size.

If you look to the top of the keyboard you will see keys that have 'F' and a number on them. They are called function keys. Typewriters didn't have these, and some of them you might use from time to time and others you may NEVER use!

F1
F1 you can press to bring up the help menu. Alot of times if you are working in a program, and you need to reference something you can click that F1 for help. If you are browsing the internet, and use F1 your help menu for your system will come up! Try it now to see what I'm talking about!

F2
F2 is something I have never used! You can use this function when you rename documents. For example, lets say you have a file you made named 'my computer basics' and you hate the title! You want to change that title to something you like better! You click that document, and hit F2 and it will allow you to change that document name. Its basically the same thing as you right clicking on the document, and hit the command 'rename'.

Highlight any folder or file, and press F2. You will then be able to type a new name for the object. After you type the new name, just click outside the name box or press the enter key to make the name change.

F3
F3 When you are working in Windows, the F3 key will open the Find Files window.

I will give you another example!

Click on the screen you are currently reading. Then hit your F3 key, and type in the word BASIC in search space provided. The FIND command will find EVERY time the word 'basic' comes up. Pretty cool huh?

F4

F4 is something I really don't use very often either...if ever! Some people LOVE it!

The F4 key has some very useful functionality. You can press F4 to open the Address bar when working in Internet Explorer. This will allow you to type the address of a Web page for quick access. You can also press the Alt key and the F4 key at the same time to close the open Window that you are currently working on.

F5
The F5 is the REFRESH key!

You can press F5 when viewing a Web page to make sure that you have the most current version of that Web page. You can also use F5 when in Windows to refresh the screen. This can be a handy shortcut.

Lets say you have two folders of letters, documents, etc. You are moving one or all of them to another folder. You just got got pasting them, but want to refresh the screen to make sure the computer understood what you were doing....Hit F5! it will refresh the screen with everything 'as is' at the present moment!

F6

This key is often used to move the cursor around the structure of the program. Pressing it will often cycle you from window to window.

I don't use this one either much!

F7

The F7 key does not have any functionality in Windows. It may, however be used in some individual programs. To find out if it is available in the program you are using, bring up the program's help screen and type in the words function key.

F8

The F8 key can be used to access Safe Mode if pressed during the computer's boot up process. For example during a trouble-shooting mode. You would push this button during the booting up process to go into safe mode instead of the regular screen we use most often.

F9

The F9 key does not have any functionality in Windows. It may, however, be used in some individual programs. To find out if it is available in the program you are using, bring up the program's help screen and type in the words function key.

F10

F10 is the key that is used to activate the menu bar in many programs. You can use F10 to highlight the first menu choice, and then use the arrow keys to move around the menus. Pressing the Shift key while pressing F10 will bring up the shortcut menu. This is similar to right-clicking on an object.

F11

Press F11 when you are working in Internet Explorer and the window will open to full screen mode. This will make all the toolbars disappear and can be useful to see more information on the screen. Press F11 when you are in full screen mode will toggle you back to your normal view.

F12

The F12 key does not have any functionality in Windows. It may, however be used in some individual programs. To find out if it is available in the program you are using, bring up the program's help screen and type in the words function key.

Print Screen/SysRq

You can use this button if you want to take a picture of the screen you are using presently. I have used this on the lessons here to show you what the individual steps are to doing things on the computer!

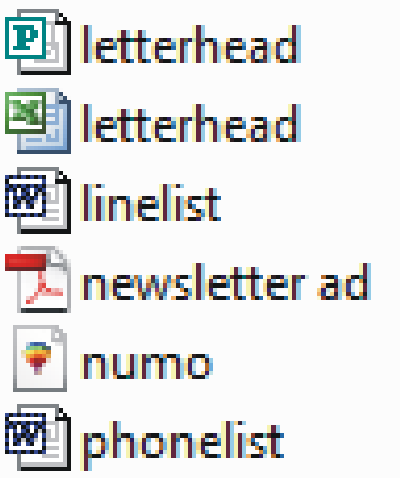
The computer places that image on the windows clipboard. You then can paste that image into a word processing program for example!

If you want to try this once we can! Open up your word processor (word, wordpad, word perfect). Click on this webpage that you are reading. Then look to the top of your keyboard, and find the Print Scrn/sysrq button and click that. Its normally right next to the function keys (The F Keys). Go to your word processor, and look to the top of the screen within that program. You will see the FILE, EDIT at the top! Click edit, and then click 'paste'. YOu should see an image of this screen on your word processor now! COOL huh?

Scroll Lock

Pretty worthless key. There are some programs that will use the scroll lock.

Pause/Break

Additional worthless key, but some older computer programs will use it.

Lets now to the BOTTOM of the keyboard!

Ctrl and Alt


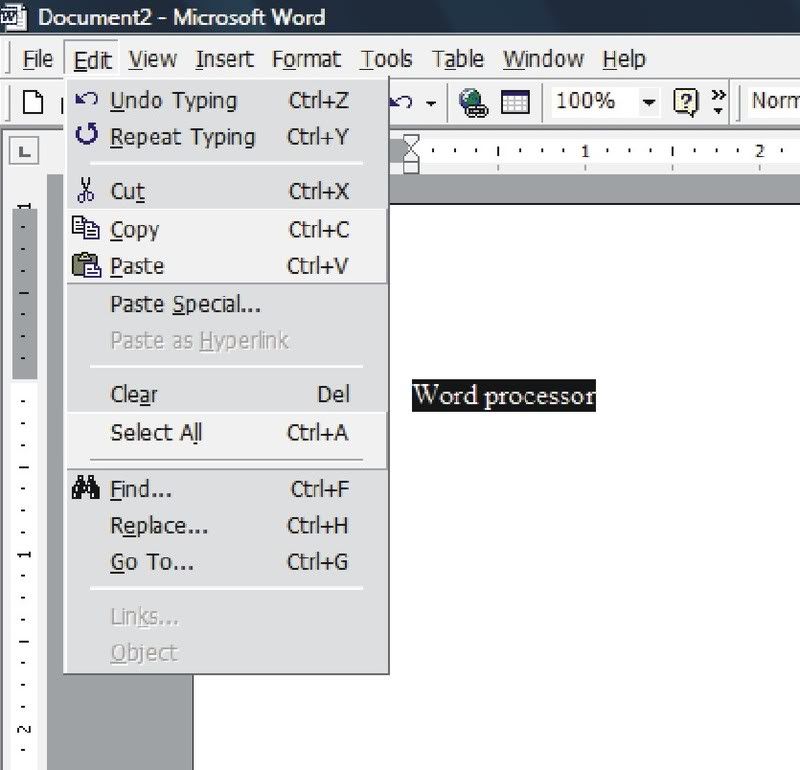
The Control (Ctrl) and Alternate (Alt) keys make other keys on the keyboard act differently from the way they normally would act. They are normally used with short cut methods.

If you still have your word processor open from the exercise we did a little while ago you can see some of the short cuts listed under the 'edit' features. For example you will see CTRL+X to CUT!

Windows Logo Key

This is another shortcut key.

(windows key) = Open the start menu

(windows key) + Pause/break = Display the systems properties dialog box

(windows key) + Tab = Cycle through running programs in the taskbar

(windows key) + E = A new Windows Explorer window

(windows key) + L = Lock your computer

(windows key) + D = Hide all windows and show the desktop. Press it again to bring everything back.

(windows key) + F = Computer and files search box

(windows key) + F + Ctrl = Find a computer on a network

(windows key) + F1 = Display the windows help window

(windows key) + M = Minimize all open windows

(windows key) + R = Quick access to the Run program box

(windows key) + Shift + M = undo minimize all program windows

Arrow Keys

These keys will move your cursor up, down, and side to side

Page up, Page down, Home, End Keys

They are movement keys as well.

Numeric keypad

You remember the adding machines? If you see this portion of the keyboard it should look familiar! You need to have the NUM LOCK button pressed in order to use this like you did the adding machine. There will NOT be any tape like in the past!

When the NUM LOCK (number lock) key isn't being used they are basically movement keys as described above.

Most of the time computers have this NUM LOCK turned on at startup!


If you look on your keyboard you will see a button that looks like it has two minus signs on it.  See the picture to the left.  Without using your shift that you would normally use for capital letters you will get a (-) minus sign.  If you use your shift key ( _ ) you get what they call an underscore key.


Don't forget if you have any question or comments use the top of this post to start the discussion! If you don't know how to do this I have also written about that! How do I comment! You can also subscribe to the lessons as they are published as well!


Tuesday 10 June 2008

How-To Change Your Mouse Settings

mouse wheelToday’s How-To Guide for the computer beginner  lesson is how to change your mouse settings.
Why would change your mouse settings?  You could be left handed, and you are more comfortable clicking the opposite way.
Lets say mouse sensitivity drives you nuts, because you can’t double click as fast as the computer wants you too.
You want to change the appearance of your pointer so you can see it better.
Those are just a few examples.
I’m going to break down how to get to the mouse settings on the computer, and then briefing walk you through all the options you have.
Keep in mind some operating systems have all the options we will talk about, and others will not. 

Change Mouse Settings on Windows 8

Swipe in from the right edge of the screen, and then tap Search. (If you're using a mouse, point to the upper-right corner of the screen, move the mouse pointer down, and then click Search.)

In the search box, enter Change how your mouse works, tap or click Settings, and then tap or click Change how your mouse works.

Change Mouse Settings on Windows 7

Open Mouse Properties by clicking the Start button, and then clicking Control Panel. In the search box, type mouse, and then click Mouse.

Change Mouse Settings on Windows Vista

Start button To Control Panel To Hardware and Sound To Mouse.

In the traditional screen on the Control Panel - just look for MOUSE under the options.
All your options should be in Alphabetical order if you are suing classic mode in the control panel.

Change Mouse Settings On Windows XP

Start button to Control Panel to Printers and Other Hardware To Mouse

Change Mouse Settings on Older Operating Systems

In older versions:
Start Button to Settings to Control Panel to Mouse

How-To Change the Mouse Settings on Your Computer

Keep in mind the mouse properties screen will look similar no matter what operating system you are using. 
You should be looking at a screen similar to the one below.    If you look at the top of this menu?  Make sure you are on the

Mouse Properties Buttons Tab


Mouse Properties Button Tab
Button Configuration
Notice the very TOP of this screen is Button Configuration.  As the description mentions if you have trouble ‘right clicking’, and you would rather LEFT click?  You can switch the primary function of the mouse to make it more comfortable for you.
Double Click Speed
Adjust the double click speed on your mouse to either slower or faster.  Some people just can’t double click fast enough, and they can slow that speed down so it is more responsive to their needs.  The opposite is also available.
ClickLock
This function can help with those that have trouble clicking on something, and having to HOLD the mouse key down for any length of time.  To be honest?  This function is better described in a visual manner, and I found this Youtube video that explains – and shows you visually how this option can help you.
Windows Mouse Properties Click Lock
If you made any changes that more fit your needs at this point?  Click apply, and these move to the next tab called Pointers.  Look to the TOP of this properties box for that.

Mouse Properties Pointers Tab

This Pointer section has already selected a Scheme.  If you look below it you will see the customize box, and it will show you what the appearance will look like.
Mouse Properties Pointers Tab
Scheme
Here you can customize your mouse pointer to one you can more easily see, such as larger or higher-visibility pointers, by choosing one of the available schemes. Click on the drop-down box below the 'Scheme' header, or press Tab until the drop-down box is highlighted, then use the mouse or the up and down arrow keys to scroll through the options until you find the scheme you want.
As you scroll through the list, you will see the pictures changing to reflect the scheme that is highlighted at the time. If you have trouble seeing well, try the schemes labeled 'Large', 'Extra Large' and/or 'Inverted'.
When you've highlighted the scheme you want, click the 'OK' button
Below is a screen shot with the different Scheme’s that this computer user had on their machine.
mouse pointer screen
Enable Pointer Shadow
The pointer shadow being turned on puts a faint dark shadow under the mouse pointer arrow, giving it a 3D appearance and making it appear to "float" above other items on the screen.  This shadow also makes it easier to find the pointer on lightly colored websites or programs.
Once again, when you make changes make sure you click apply at the bottom to save your choices.

Mouse Properties Pointer Options


mouse properties pointer options
Motion
The pointer speed is how quickly you want that pointer to zip across your computer screen.  This is personal taste once again.
Enhance Pointer Precision
To make the pointer work more accurately when you're moving the mouse slowly, select the Enhance pointer precision check box.
Snap To
To speed the process of selecting a choice when a dialog box appears, select the Automatically move pointer to the default button in a dialog box check box .
I personally would rather do this myself, but some people do like the control of this option for personal reasons.
Visibility
These three options may or may not be available to you, and once again they are personal preference.  They explanations are pretty much self explanatory.
To make the pointer easier to find when you move it, select the Display pointer trails check box, and then move the slider towards Short or Long to decrease or increase the length of the pointer trail.
To ensure that the pointer doesn't block your view of the text you're typing, select the Hide pointer while typing check box.
To find a misplaced pointer by pressing the CTRL key, select the Show location of pointer when I press the CTRL key check box.
Once again, if you make changes you should click apply at the bottom of the screen.

With some of the older operating systems like pictured below you options maybe more limited. 
Mouse Settings Properties ScreenM

Mouse Properties Wheel Options


mouse wheel
Just to make sure we are clear as to what the ‘Wheel’ is I have pointed to it in this picture.


Mouse Properties Wheel Options
Vertical Scrolling
To set the number of lines the screen will scroll for each notch of mouse wheel movement, under Vertical Scrolling, select The following number of lines at a time, and then enter the number of lines you want to scroll in the box.
To scroll an entire screen of text for each notch of the mouse wheel, under Vertical Scrolling, select One screen at a time.
A Notch you can FEEL a click when you roll your finger on it when it moves.
Horizontal Scrolling
If your mouse has a wheel that supports horizontal scrolling, under Horizontal Scrolling, in the Tilt the wheel to scroll the following number of characters at a time box, enter the number of characters you want to scroll horizontally when you tilt the wheel to the left or right.
Again all of this is personal preference, and if you made some changes make sure you click apply when finished.

Mouse Settings – Hardware

This basically is showing the software, drivers, etc. that the computer uses to operate your mouse.  I would leave that alone!

If something is not clear, or you feel something should be added to our lesson? Please feel free to leave your comment or question in section we provided.


Also please subscribe by leaving your email in the box supplied, and you will received future lessons by email as they come out.

Thank you for reading our How-To Guide for the Computer Beginner lesson Changing your Mouse Settings!

Saturday 7 June 2008

Basics about the computer mouse, and how to clean it!


EWWWWWWWW! Yuck!!! IT is FUNNY........tee hee!

I wanted to go over some parts of the mouse, and I'm sure you know some of this already! First this start with some basic terms that you will hear alot.


Point

The end of your cursor is what you use to POINT! You POINT the end of your cursor on whatever item you are dealing with!

Click

Point to something with the end of your cursor (icon, program, etc), and then press and release your left mouse button.

You can also point and click in a document to add or remove things!

Try NOT to move your mouse around with you do this! I have moved objects around when I did that!

Right Click

Its basically the opposite of click because you will be using your RIGHT button, instead of our LEFT button that you will use most of the time!

Typically you use the right click to view menus for applications you are using.

Double-click

Double-click is clicking twice, but you will do this pretty quickly! You don't want to move the mouse for this option either! I remember the first day I tried a mouse, and even to this day at times I might not DOUBLE-CLICK fast enough! It happens to the best of us!

Normally you are executing something when you double-click! For example, opening a program!

Drag

Point to an object, and then HOLD DOWN the left button (don't release it) while moving your mouse (and the object) at the same time!

You will use this if you are trying to select text for example, and if you are working on a drawing.

Goodness knows there are enough of the different types of computer mouses out there, and I will try to touch on few a few!


This is a typical 2 button mouse.


This mouse has a wheel in the center.

They both work the same pretty much the same thing.

The center button (depending on the type) you can rotate the wheel, and at times CLICK it as well!

Depending on the application you are using you can scroll UP and DOWN the screen using that center button.

You can zoom in or out while you hold down the CTRL key and rotate the wheel.

Those are few examples. Myself - I don't use it very often at all!

Depending your mouse type - it is said that some mouses may not need this - you will need to clean the mouse.

The first thing you may notice is your mouse just isn't moving along the way it used to. It won't move where you move it, or just plain just sits there!

The first time this happened to me I thought it was broken!

Flip the mouse over, and look at the bottom. At times you can really collect alot of JUNK there. All kinds of debris collects under there, and I would say wiping it off cures this mouse issue 90% of the time!

I normally don't spray any cleaner directly on the mouse itself. I may take a rag, and spray a little cleaner on it to remove the debris. It wouldn't take that much to clean it off.

My mouse has a spot where you can see a red light, and I make sure that is cleaned out as well.

Some of you may have different types of computer mouses. You may use a ball to move the cursor around, or you may have a ball literally on the bottom of you mouse!

I felt a visual would be best for this type, and I could a good video on Expert Village for that!

Pretty simple huh?

Don't forget if you have any question or comments use the top of this post to start the discussion! If you don't know how to do this I have also written about that! How do I comment!

Friday 6 June 2008

What is the difference between hardware and software?

THIS is a great question for people just starting out, and just plain never did know the difference! You do need to know the difference so you can understand what people are talking about!

First off hardware and software work together to make your computer work! You wouldn’t be here if you didn’t have them both!


Hardware includes the physical components, such as the motherboard, chips, memory, and hard drives! The CD rom or the disk drive you use is hardware! I guess you could just plain call it the parts to the computer! If you ever opened up your computer will see ALL kinds of items in there, and those parts are your hardware!


Software on the other hand is the program that makes your computer RUN, or accomplishes some task you are doing! One program you use everyday is your operating system! We speak here about the different versions of windows (Windows 95, 95, ME, 2000, XP, Vista), and all of those are operating systems! If you like to write letters on Word, WordPad, Notepad, Word Perfect, etc. those programs are software programs as well!

This is a very simple explanation of the difference! They do work together, and you need to have both in order to run the computer!

How to leave a comment, question on a blog?


Tee HEE! I thought the picture was cute.....I couldn't resist!


Blogger help section has a really good explanation on how to leave comments or questions! Click HERE

My articles have the above image that you click in order to leave a comment or question.
Once you hit the image above?  You come to a comment box that looks like this:

If  you have a google account you can place your information within that.  The same goes for Open ID.  You have a name and URL option, or just plain anonymous.

Feel free to leave feedback, because that is how we both learn!

Keep in mind your comment may not show up right away, because I moderate the comments. I have found you get a lot of spam comments about finances, XXX rated stuff, prescription drugs...lol among other things! We get enough of that in the email we don't need to see their advertising here!

Sunday 1 June 2008

Explanation of 'icons'! YEP there are different types!

The next few lessons will try to break down the 'computer desktop' into sections. We will show you the different parts of the computer desktop, so you will know what they are and how you can use them!

I think the most obvious portion of the desktop is your icons! Those little pictures that are spread all over your desktop with names under them! The basics for this lesson are pretty much the same for all operating systems. You may have less colorful icons in the older ones.


There two different basic types of icons that I can think of!

ONE is the file exel fileor folder iconiconplain foldericon folder


TWO is the program or application icon exel 14Word Icon

I guess your next question would be what is the difference between a file or folder icon and a program or application icon is that correct?

Application icons are the easiest to remember! It’s the icon you click on to make a program start! It’s like your 'remote' to the Television to turn it on!

WoRd


IE icon for blog
The Recycle Bin

These are examples of application or program icons. The composition of the icon makes use of perspective, color, and shading to provide photo-realistic representation of the programs. Applications are tools for the user, so application icons should always show a picture of a tool that indicates the nature of the task the application is designed to accomplish or complete.

The 'W' is for a word processor program you may use now to write letters on! The Mozilla or the IE would be how you get on the Internet! The recycle bin is where you store your garbage before you decided to TAKE OUT THE TRASH! It’s basically where your files go when you delete them.


If your application (ie: word, excel, etc.) creates a file (like a letter or spreadsheet that you save) those files would be called file icons. This helps you avoid the frustration of looking into a folder full of document files with generic icons and being unable to identify which applications created the files.

Most of the time these are NOT placed on the desktop, but there are times in which people may use a file constantly and want it there for easier use!

The above are files created in Power Point, Word, Corel Draw, Adobe, Excel. The programs themselves are application icons. The documents we created with those programs are called File Icons! For Example, the phone list was made in Word (See the Word Icon) but the name next to it was phone list. It’s a phone list MADE in Word!

The older computer may not use visual icons like this, but your file extensions should clue you in as well! For Example: Lampchop.tif could be a picture of your lovely lambchop dinner you sent to your brother to make him drool! phonelist.doc could be your list of current phone numbers you keep on the Freezer!

Folder icons are literally FOLDERS (pictures of them). You can use those much like you use folders at home. For example, you have a folder you place all your different statements for bills like: Gas, Electric, Credit Card, Bank Statements, etc.

For our computer at home we have 3 main folders: MOM folder, DAD folder, and KID folder.

For this example I’m going to use ‘stereotypical’ examples so you can get the picture of what I’m trying to get across!

In my MOM Folder she may have some ‘file’ documents that she typed up with her favorite recipes to keep handy with a touch of her mouse! She may also have her Photoshop program icon there also that she uses all the time for her scrap booking projects!

Photoshop program - program Icon (application icon)
Scrapbook programs - file Icon

The document that contains her recipes are file icons
The program she used to created it in is a program or application icon


In my DAD Folder he may have spreadsheet documents for work that need to be updated on a regular basis, and for his ‘application’ maybe quicken for the families finances.

The spreadsheet he created is a file icon, but the program he used to create it is a program or application icon! Quicken would be an application Icon as well!

In the KID folder it could be copies of their recent book report, science project they are working on! It will also have their latest game they love to play in their free time!

Application Icon - SpongeBob Square Pants Computer Game
File Icon - Science program and Book Report they are currently working on.

Other examples may be:

Website shortcuts to websites you visit on a regular basis (like this one? LOL!)

At times you are going to download a program, and you want to know WHERE you put the file and the desktop is a great place to do just that!

You can place all of these things in your folders on your desktop. Its called CLICK ON IT, and keep it held down and DRAG to where your folder is. Once on top of that folder - RELEASE and it will be in there for the next time you go looking!

It nice for families to have their own, or maybe you have a collection of things you wish to keep on your computer for church and ONE for your hobby! Make TWO folder Icons! One for EACH!

Remember FILE is something you create, and FOLDER is what you store it in! Program or Application Icon is the item you use to create your file icon!

I found a video program I attempted to explain some of this in. I have a cold so excuse my voice! I will try to do better in the future!

Remember if something isn’t clear – go to the top of this lesson and hit the word ‘comment’ and write me a note! Chances are you aren’t the only one!